I attended a workshop at Phoon Huat in mid June last year. That was my first baking class upon the discovery of my interest in baking. I paid about S$36.00 for the hands-on half a day class and it was really an eye-opener for me into the baking world.
I came half an hour early at this Phoon Huat's Geylang Branch and was very delighted to see for the first time all baking supplies, ingredients, equipment all available under one roof. To my pleasant surprise I was also able to peep into one workshop classroom whereby the pastry chef was busy arranging some baking utensils and then decorating some cupcakes while waiting for the next class to begin. I wasn't attending his class. I went into the classroom next to his and pick a table since I was the early few 'aunties'. All 4 sides of this classroom were packed with industrial mixers, ovens, racks storing all the baking utensils and ingredients, fridge etc, leaving a small opener for the glass door as entrance.
An auntie sitting next to me began settling down and digging out the spatulas, measuring cups, spoons, bowls, etc weighing scale and started to do the washing. She then proceeded to select her 'favourite' mixer (there were about ten industrial mixers), unlocking it and continue with her washing. I rolled my eyes and was wondering why she knew what to do and what was she doing! I began to asked and she told me, "I am the regular here". Nodding my head, I grinned and later doing the same things that she did when attendees started to stroll in one by one and most knew what to do exactly like her!
The instrutor came in resting half of his butts on the kitchen top, introducing himself and started distributing and reciting the first recipe step by step. I was trying best of my very best to understand his explanation and instruction but still was lost in between. Urrrh, i told myself, 'Nevermind, just listen first and follow the flow later loh'. After finished reciting the steps and explaining them, the instructor told us to select the mixer, take out the necessary 'barang-barang' = items from the drawer, collect the ingredients at his table top and proceed with the recipe.
Luckily I was paired with a local Chinese lady who happened to came back from Shanghai for a holiday and she bakes quite often and know the basic stuff quite well. She was like my angel of the rest of the day as I was 'blind' in baking!!
The instructor may look aloof to me but I know he knows his stuff well from his answers to the questions being asked. Perhaps he has done this too many times until he is getting a little 'sian'=boring.
Personally this workshop is worth attending as I did learn how to make these two recipes well, knowing what and what not to do/use/buy from the instructor, learning how to operate the mixer that is different from what we usually have at home and etc.
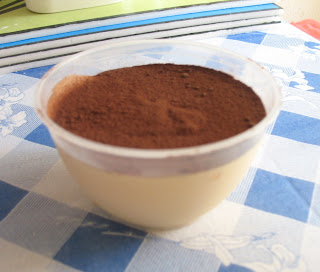
The most worth for money attending this class was that all ingredients are provided and we got to bring home the baking products at the end of the day. I brought back 6 cups of tiramisu deserts and one about 7 inch oats crumble.
My family was delighted to be able to taste my hand-bake products that tasted really like professional!! Kudos to Phoon Huat!

 I cooked this stir fried black pepper shabu shabu a day after Chap Goh Mei (the 15th day of the Chinese New Year). We bought quite a lot of shabu shabu worrying that it would not be enough to serve our guests during the reunion dinner. It ended up that we have more than enough and plentiful of different variety of vegetables, mushrooms, seafood, meatballs, meat and etc for the steam boat. It was a good catch up, fellowship and feast!!


